I have a confession to make. I will share it with you as long as you keep it between just the two of us. Are you ready? Okay. Here goes! I am horrible with time management… or at least I used to be before I started using time blocking techniques. But, once I realized how time blocking can increase productivity, I got on board, fast!

How Time Blocking Can Increase Productivity… Continued
I kid you not! This used to be a serious issue for me. Back when I first decided to start a blog, I had absolutely no idea how much time it would take to manage the thing. I thought that I would be able to do all of my regular daily routines and just toss in a couple of quick posts each week. W
And to make matters worse, I have a strong tendency to veer off course. I would go online to check my social media accounts. Then, somewhere along the way, I would find that I had just spent several hours watching funny animals.
I also quickly saw that those couple of quick posts a week could easily turn into several days’ worth of stress-filled work. I needed a system to keep myself in check and to help me stay on target to hit my deadlines. Plus, I really enjoy sleeping, and I wasn’t seeing much of that with my old method.
I tried using a standard planner to jot down what I needed to do each day. I tried planning things out in both weekly and monthly increments. I even tried the to-do-today lists to help me get things done. But, to-do-today became to-do-tomorrow, and my scheduling ended up being just wishful thinking. Enter time blocking.

What is Time Blocking?
You may have seen time blocking being used in your child’s class schedules, or maybe you used them yourself. It is sometimes called schedule blocking or calendar blocking, but regardless of what you call it, it is a very simple method that works wonders.
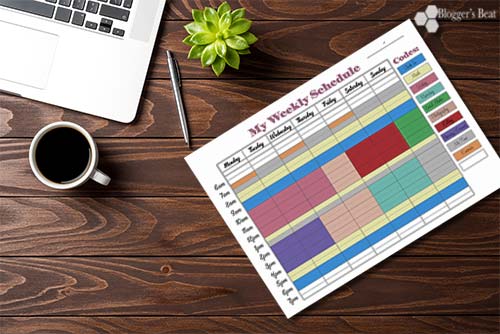
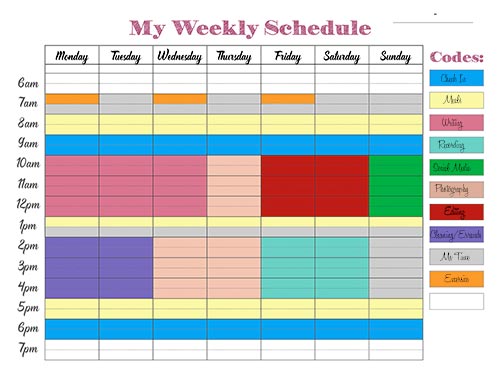
All you need to get started is a different way of thinking and a weekly planner comprised of 30-minute segments. You can either create your own or you can sign up for my newsletter and use mine for free. Cause guess what? I have a gallery of printables that are provided exclusively to my subscribers!
In addition, it is actually fun to do the scheduling because it is coloring and organizing all at the same time. Then again, maybe that’s just me being a really weird nerd.
How I Set Up My Schedule
To get started with time blocking, I found that it was best to include both personal and business in your schedule. Most of us have everyday events that we just can’t exclude. Having them included as part of my day prevents my work time from suffering and makes it easier to stick to my schedule.
- Next, I made a list of all of the personal things that I absolutely have to do each day. For me, these things included exercising, homework time with my child, and meals with the family. You may have other things that you can’t avoid doing.
- Then, I made a list of the things that I absolutely have to do for work each day. I know that I have to check my emails daily, and I also have to do the rounds on my social media sites to respond to comments. If you have a VA, you can probably skip that part, but I am still pretty much a one-woman band.
- Once I have the daily must-dos, I create a list of the things that must be done each week. For me, that is photo editing, recording, video editing, scheduling social media posts, and writing. (I prefer to write daily, but since it isn’t a have-to-case, I put it in the weekly list).
Getting it Down on Paper

With my list in mind, I set down to create a preliminary block schedule. It is normal to need to make adjustments to a block schedule after the first few days. If you are using my printable, that shouldn’t be a concern. You can print as many copies as you need. In fact, print off some extras so that you will have some for when your schedule needs updating in the future.
- With my handy-dandy colored pencils in hand, I started coloring blocks of my day beginning with my personal daily must-dos.
- Each time I filled in a block for a particular activity, I would write the name of that activity in one of the color legend boxes. Then, I would color in the box with the same color used in the schedule.
- I repeated this step for the daily work must-dos.
- Finally, I got to the weekly must-dos. Here is where it gets interesting.
- I decide which activities are the most important and what time of the day I am most productive at those activities.
- Then, I started filling in for those activities.
I continued working the schedule like this until I had it filled. Some things required large chunks of time. Other things didn’t take as much time to do on a daily basis but were better suited to one large chunk of time once per week.
Final Comments
Each day, I pull out my schedule and start working. I don’t allow myself to deviate from the schedule unless there is an emergency. To keep myself on task, I set the timer on my phone at the beginning of each segment.
Occasionally, I will get a project or agree to do a sponsorship that will require an alteration of my schedule. When this happens, I just transfer my daily must-dos over to a new printout and start blocking in the new assignment. I fill in what is left with my weekly must-dos.
This simple system has been the only thing that has been able to keep me on task. I am now meeting my deadlines without scrambling during those last few hours, and I am getting more sleep.

Please keep it clean. Comments that do not follow the Comments Policy may be removed.