Have you ever wondered how to send viewers straight to a pertinent piece of information in a post/page? We call those jump links or anchor links, and they frequently occur within a table of contents or as a way to direct viewers to recipe cards, lists, or a different page. Creating a jump link is quite easy and a great little trick to have in your arsenal.

Why Jump Links Are Important
As I said, jump links can be used when you want to create a table of contents for a lengthy post. The best part of using jump links to make your own TOC is that you don’t need to install an extra plugin.
Plugins add a lot of extra weight to your site and can introduce opportunities for hackers when they are not properly maintained. A good rule of thumb is to only use plugins when you absolutely need it, when it serves a vital purpose, and when it can’t be done manually.
The same thing goes for some of those other plugins that people love to use to jump people around on their posts or pages. Yeah, I know. That is sometimes easier said than done. Right? But, that is why knowing how to make your own jump links is so useful.
Fortunately, WordPress makes it easy to do. All you need to know is where to look and a few extra steps. You’ll be surprised how easy it is to do yourself!
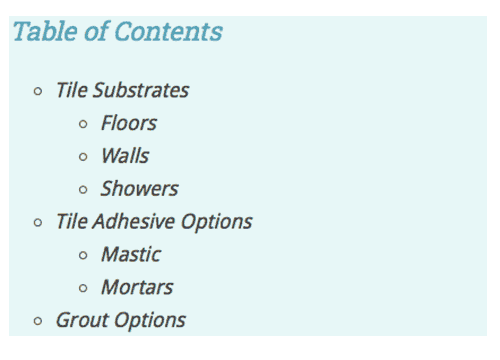
Here is an example of a TOC that I made on a different blog to allow viewers to jump through a very detailed post. I did it all using Gutenberg. No plugins, and it works perfectly!
So, let’s take a look at how to add jump links. I am starting with Gutenberg but I am also including instructions WordPress Classic. You can go ahead and jump to those instructions now. (See what I just did there?)
Creating Jump Links With Gutenberg
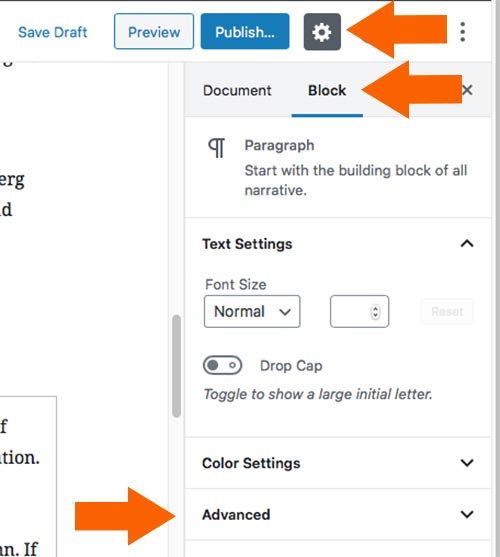
In Gutenberg, creating jump links is built right into the system for ease of use. First, select the Headings block that you want to be your landing location. (i.e the jump to location).
Next, locate the Advance settings for blocks. It will be in the right column. If you don’t see the setting at the right, click the gear located at the top of the editor.
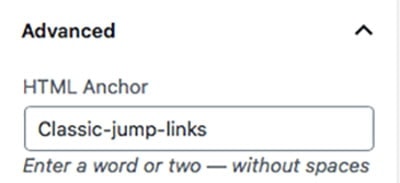
Next, you will type a title in the HTML anchor box. Make sure that you give it a name that is easy to remember but also one that you won’t need to reuse again.
For instance, the jump link that I used above to direct people to the heading below is named Classic Jump Links. I won’t use that name again within this post, but if I need to, I can use numbers to delineate duplicate anchors. (i.e name-1, name-2, etc.)
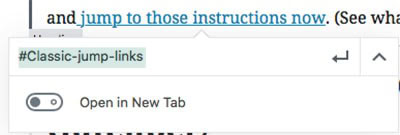
Finally, head back up to the text that you want to make into your jump link. Highlight the text and click the link icon just like you do to insert any link.
Now, type a pound sign and the anchor title that you created in the previous step. And that’s it. You just created a jump link.
Want to see how to jump from one post to another? Jump down to those instructions, now!
Creating Jump Links With WordPress Classic
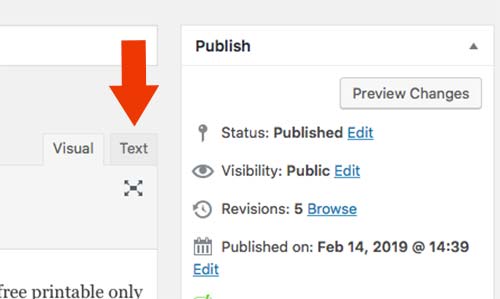
In the classic version of WordPress, you will need to switch to the text editor to make the jump links. Locate the heading that you want to jump to and give it an id name. The code should look like this:
<h2 id=“insert-name-here”> Your Heading Goes Here </h2>
Now let’s look at this using my previous jump to or anchor link from above. In the classic text editor, the heading for this section would look like this:
<h2 id=“classic-jump-links”>Creating Jump Links With WordPress Classic</h2>After creating the id, you follow the same process to create the link for the text. Highlight the text, link to #name.
Jumping from One Post to Another
Now that you understand how to create an anchor, you can use those same anchors to jump from one post to a specific spot within another. Sounds cool, right!
Just head on over to the post where you want the viewer to land. Find the heading for the location and give it an id name.
Next, go back to the post where the link needs to be placed. Highlight your text and click to insert a link.
Now, instead of typing #your-id-name, you will type the post URL first. The text link would be: post-url/#your-id-name
So, let’s say I wanted to link to a location in my post on creating nofollow menu links (which by the way is another trick you should learn). My linking text would look like this:
bloggersbeat.com/add-nofollow-navigation-links/#my-id-name
That’s it! Give it a go sometime. You will become addicted to the ease!


Please keep it clean. Comments that do not follow the Comments Policy may be removed.